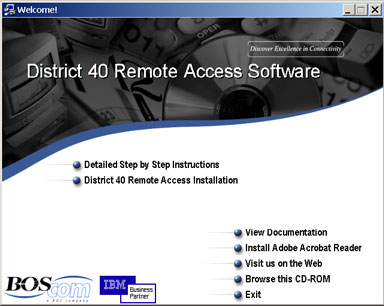
Insert the CD into the drive. If the menu doesn’t appear after 20 seconds, go to “My Computer” and double-click your CD-ROM drive. Double-click the file named BOSIntro.exe. The following screen will appear.
Choose the first option to open the step by step instructions, then choose the second option to start the installation.
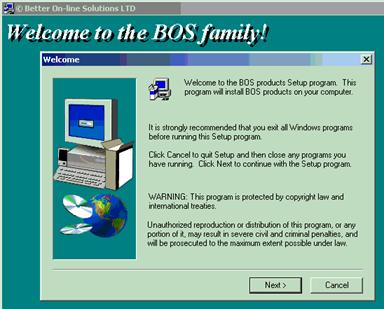
Click “Next”.
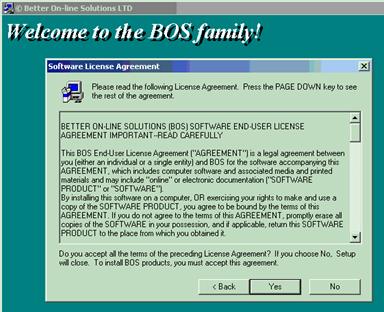
Click “Yes”.
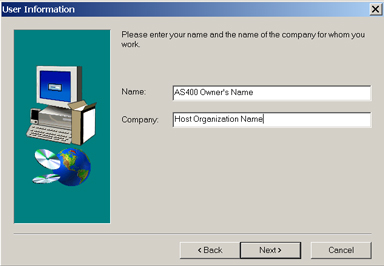
Enter the name as Matt Westman and the company as District 40.
Then click “Next”. Do not use your name, the software is already registered in Matt Westman’s name.
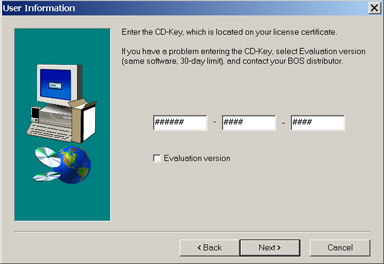
Enter the CD-Key as 069530 VL71 2DRP
Then click “Next”.
.
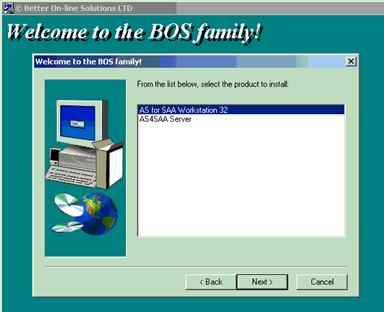
Select “AS for SAA Workstation 32”. Then click “Next”.
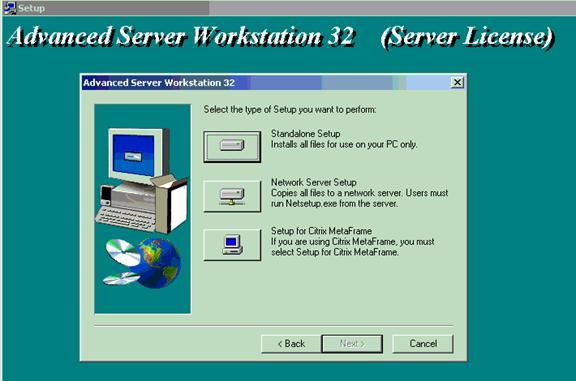
Select “Standalone Setup”. Then click “Next”.
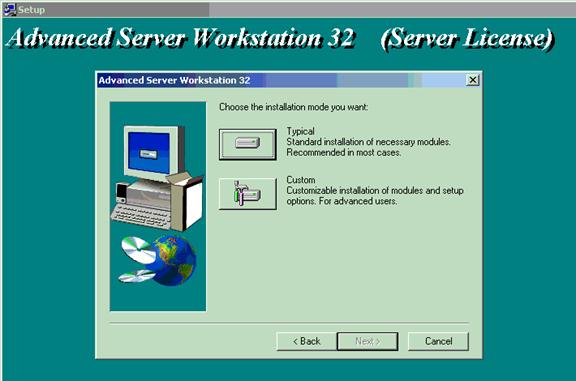
Select “Typical”. Then click “Next”.
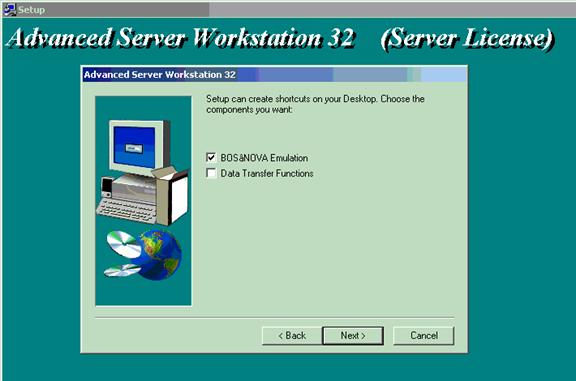
Click the check box for “BOSaNOVA Emulation”. Then click “Next”.
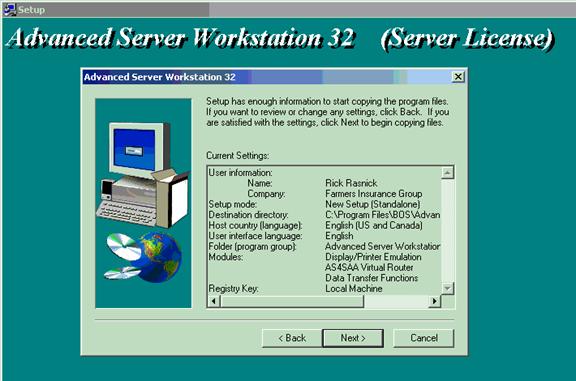
Click “Next”.
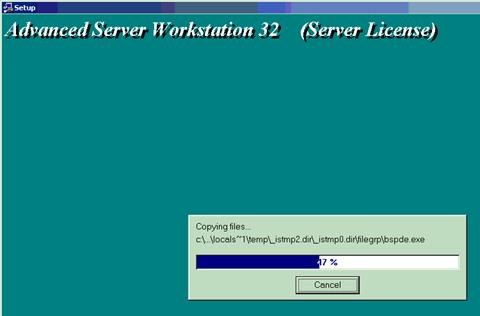
Wait while the program loads.
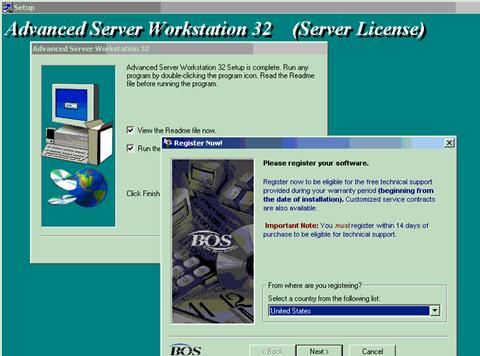
If the registration window pops up, click “Cancel” in the registration window. The software has already been registered, it is not necessary to register it again.
Do not click Cancel in the other set up window.
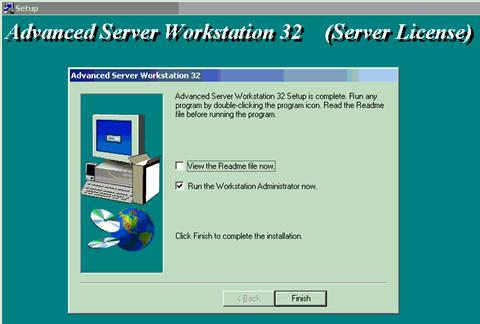
Check only the “Run the Workstation Administrator now” box. Then click “Finish”.
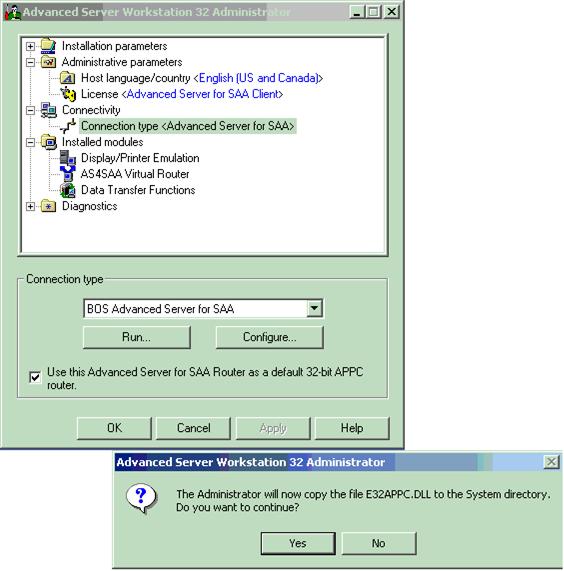
Highlight the “Connection type <Advanced Server for SAA>” in the upper window, if it is not already selected. Click the check box near the bottom, next to “Use this Advanced Server….”
A confirmation window will appear, click “Yes”. Then click “Configure....”
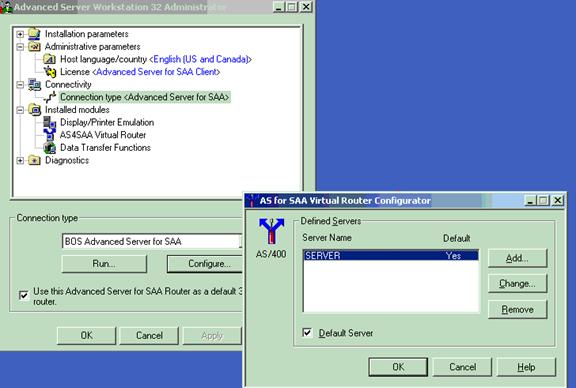
The “Virtual Router Configurator” window will open. Select the first entry and click “Change”.
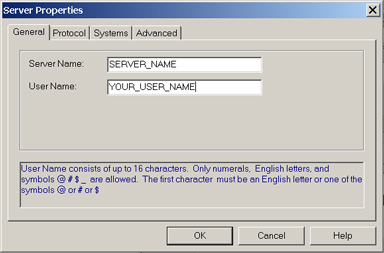
The “Server Properties” window will open. Click the “General” tab if it is not already selected.
In “Server Name” enter WESTMANSAA.
In “User Name” enter the user ID you were given for remote access. This ID was created by the District office for you. Usually it will be your first and last initial followed by your three digit agent number (e.g. MW301).
Click the “Protocol” tab.
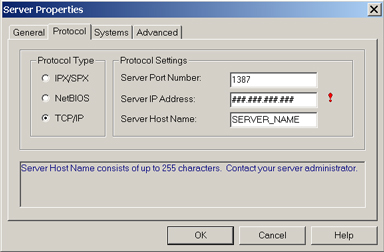
Click the white space next to “TCP/IP”.
In the “
In the “Server IP Address:” box, enter 66.92.250.143
In the “Server Host Name:” box, enter WESTMANSAA
Click the “Systems” tab.
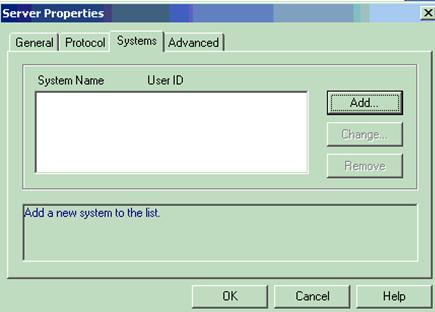
Click “Add…”
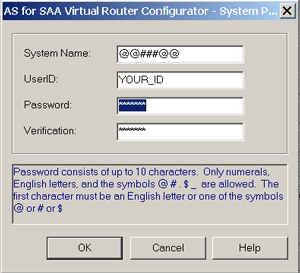
In “System Name:” enter VS317BA
In “UserID:” enter your AS400 log on ID. This ID was created by the District office for you. Usually it will be your first and last initials followed by your three digit agent number (e.g. MW301). (It is not your network ID, e.g. A965901).
In “Password:” enter your password. Your initial password is usually the same as your user ID.
In “Verification:” enter your password again. Then click “OK”.

Click “OK”.
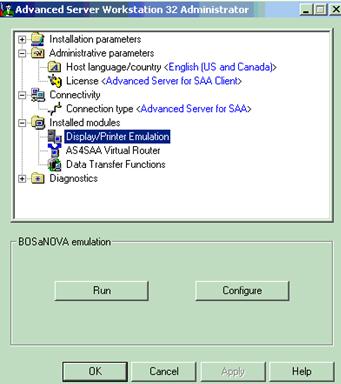
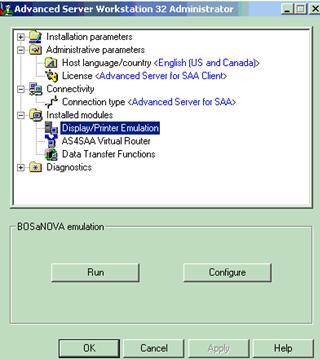
Select “Display/Printer Emulation”. Then click “Configure’.
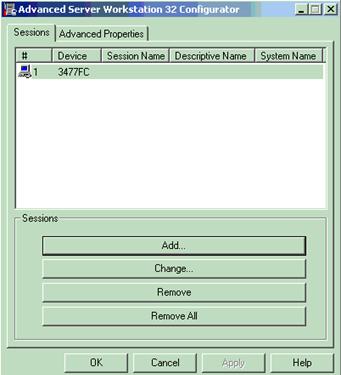
Select the “Sessions” tab if it isn’t already selected. There should already be one device listed. If you want a second session (like logging on two times for two screens), click “Add….” Do not create more than two display sessions, they are in limited supply. If you have a printer attached to your PC, you may also add one printer session by clicking “Add…” and then selecting the “Printer” tab on the next screen.
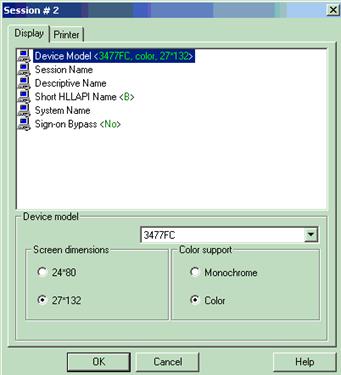
If adding a display session, accept the default settings for a “Device Model <3477FC…> and click “OK”.
If adding a printer session, select the “Printer” tab and refer to the next step.
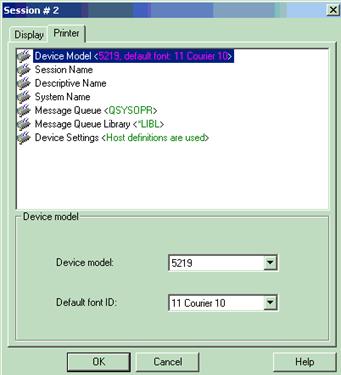
If you are not adding a printer session, skip this step.
Click the arrow in the first small white box and select 5219. Accept all other default settings for the printer.
Click “OK”.
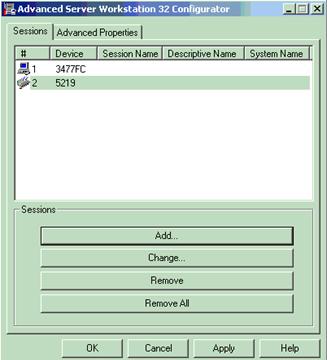
The screen will now display all of your sessions. You should have one or two display sessions and possibly one printer session.
When you are done creating sessions, click “OK”.
Click “OK”.